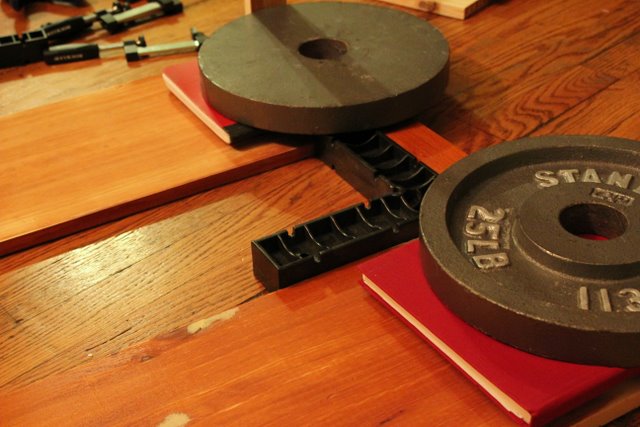
This is the post about the corner-shelf-thing.
We shall call her Slats.
You'll see why later.
We're making Slats out of this pile of wood that was once an entertainment center of some kind that someone gave to us.
One really nice thing about this particular pile of reclaimed wood is that it comes with some pretty nice free hardware. Check it out.
One UN-nice thing about this particular pile of reclaimed wood is that it's all stained really dark and shellacked or something (the above photo is, at least on my screen, exactly the same color as the wood). So it has to be sanded-the-crap-out-of.
*I suspect this is true for all reclaimed wood, but what do I know
I sanded the finish off the ends of all cut pieces with 60 grit on an electric sander so that the wood glue would bond well and make a good joint. Pretty easy, actually, but do wear a dust mask, for Heaven's sake! The above pieces will make up the "legs" of Slats.
Perhaps I should show you what Slats looks like? Would that help?
There she is...Printer Home. Those shelves are meant to slide in and out. Now you see why we're calling her Slats? I wanted the framing to be open for two reasons:
1 - She sits awful close to a floor vent I didn't want to block
and
2 - She's really big, and I thought she'd be too heavy. Like the file cabinet/bookcase thing (why don't we have a proper name for that one yet?).
These rectangles make the upper and lower framing for Slats.
Dave did most of the sanding on these, mostly because I forgot they needed doing. They were glued up on Clamp-Its and reinforced with counter-sunk screws, 2 in each joint.
This is me, spacing, gluing, and clamping the side slats/legs onto Slats's upper frame.
Each glue joint then got 4 countersunk screws for reinforcement. (The books are there to help the weights/clamps balance. The Clamp-It is kinda acting as a square, but mostly it's there to provide evenness of spacing.)
I attached both the top and bottom framing to the 2 slats on the floor this way. Then I flipped her over to glue, clamp, and screw the other side.
Then I flipped her on her face and did up the slats/legs on the back (no pics, I forgot). The lower frame doesn't sit flush to the floor...the legs do, obviously, but the framing is designed to sit 1/2" short to allow the floor vent that Slats sits near room to breathe. You can see the legs overhanging the frame in the photo. It's not the prettiest solution, but I think it will work.
Then we laid the bottom. It did eventually get screwed down, but not immediately. First, I wanted to install one of the sliding shelves and see how it did.
I saw this done once with scrap wood to place your drawer glides exactly.
Thank you Woodsmith and Pink Toes and Powertools
I, however, am not quite so picky. The shelf needed to rest about 7" above the bottom, so I hunted around until I found something in the house of about the right height.
Ah, King's Quest...relevant in all walks of life!
I'm not sure why I even have that King's Quest box...it's full of disks. You know, disks?
If any of my siblings wants it back, you can have it. I don't have the right drive for it on my computer anymore, anyway. But you gotta wait till Slats is done before I can spare it.
Anyways. The above method worked perfectly. So I took it apart.
And painted Madame Slats with 1 coat of primer. That's one of the shelves there on the right, leaning against the wall.
(See how the frame sits off the floor and leaves a gap? That's what I was trying to explain. Shoulda waited for the picture, I guess.)
This was two days before I left for work. And that is all I had time for. The next day, as I was packing, I took this one.
That's our primer back there...Bulls Eye 1-2-3. Good stuff. It covered over that dark stain pretty well in a single coat, though I think it'll probably need three. It was at the very point that the phrase occurred to me "it'll probably need three" that I asked Dave,
"Do you think we should just push them all against the wall, set some wood on top, and call it done? Forget the paint, heck, forget the screws, just call it done??"
He hugged me.
And he said it was ok to leave it all right where it was when I left for work in the morning to be gone for 14 days. It's sitting in the walk-way, not even maneuverable. Dave is not a big one for mess...he'd rather just get rid of all our stuff than have a mess. But he told me it would be ok. It gives me a lump in my throat. He's ok with my mess. And I know it's "our" mess, and our project, but still...I sure miss him.
And guys, Slats IS a big girl...2'x3 1/2' and 30" tall or something like that. Good thing she's not solid, or she'd be too heavy to move once assembled. I mean, I knew the measurements (I DID design her), but 3 1/2' on a computer screen is just NOT the same as 3 1/2' blocking the walk-way.
I hope you're all having a good week! I am halfway through my hitch and going to be pretty happy to go home.
OH! And I forgot to tell you, I found something AWEsome the other day back behind the base lodging over by the dumpster. It's really really cool! I'll show it to you...someday...when I figure out what I'm going to do with it.
Cheers!


The camera added at least ten pounds to my arm hairs.
ReplyDelete